This article will take you through generating RSA keys using PuTTYgen on Windows for secure SSH connection, settings Putty password-less SSH login,and settings timeouts for connection session.
Introduction
One effective way of securing SSH access to your VPN is to use a public/private key. This means that a ‘public’ key is placed on the server and the ‘private’ key is on our local workstation.
Generate Keys
PuTTYgen
In Windows we will use PuTTYgen to generate our public and private keys. Download PuTTYgen from the official website setup package including PuTTYgen puttygen.exe.
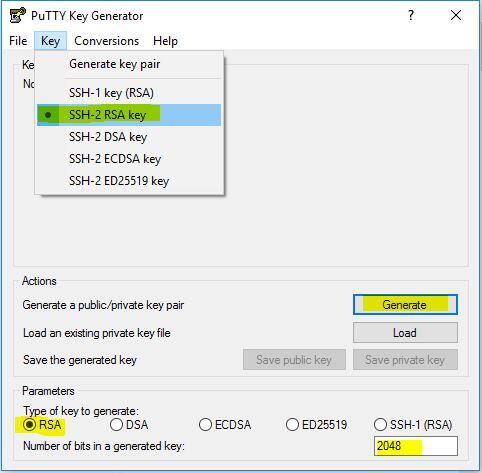
As shown in the screenshot select SSH-2 RSA Key with 2048 bits, hit the Generate button and move the cursor randomly on Putty Key Generator field window in order to produce SSH Keys
output screen will be as below
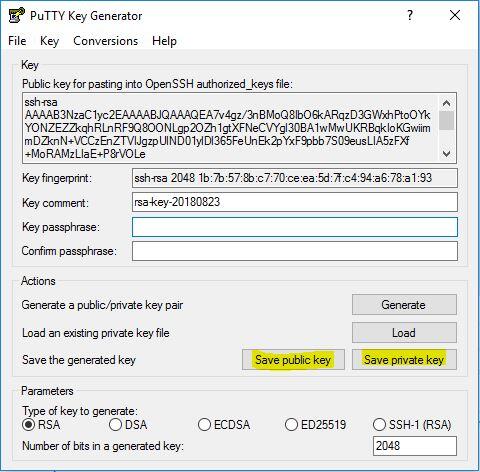
you can add a Key comment to help you easily identify your key, but for passwordless and automate login without prompet we will keep Key passphrase field empty.
- Save both keys (Public and Private Keys) files to a secure location into your device.
- Copy the output public key from PuTTYgen window, as below screenshot.
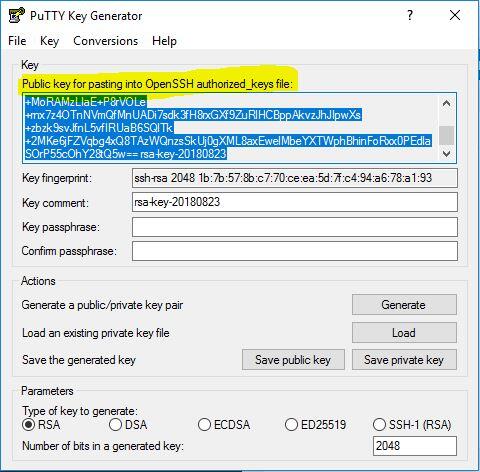
Copy the Public Key to the clipboard and paste it at the very end of “append” @ ~/.ssh/authorized_keys on your VPS. If that file doesn’t already exist, you will have to create it (nano ~/.ssh/authorized_keys).
Usage
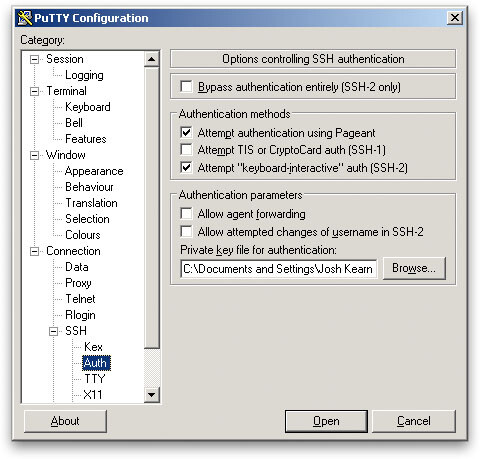
To make use of your newly generated RSA key pair, you will need to tell PuTTY to use it when connecting to your VPS. Do this by opening PuTTY and going to the “SSH” -> “Auth” section. Browse to where you saved the keys and load the private key as seen below:
Timeouts
PuTTY Client side
To keep connection session opend, you need to setting up keepalive value for PuTTY Client side as below screenshot
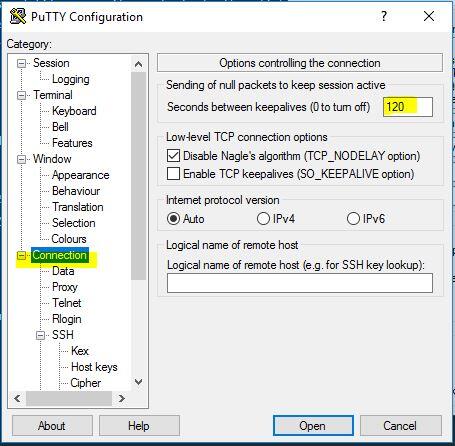
This will send a “null packet” every 120 seconds on your SSH connections seesion to keep them alive.
SSH Server side
edit or add (if not exist) the following configuration parameters values, for the SSH Server daemon config file:vim /etc/ssh/sshd_config
ClientAliveInterval 120
ClientAliveCountMax 720
This will make the SSH Server send the PuTTY/Clients a “null packet” every 120 seconds and not disconnect them until the client have been inactive for 720 intervals (120 seconds * 720 = 86400 seconds = 24 hours).
PuTTY Session
Make PuTTY use the key every time you connect to your VPN by saving this configuration. After loading your key as shown above, go back to “Session” and save your session:
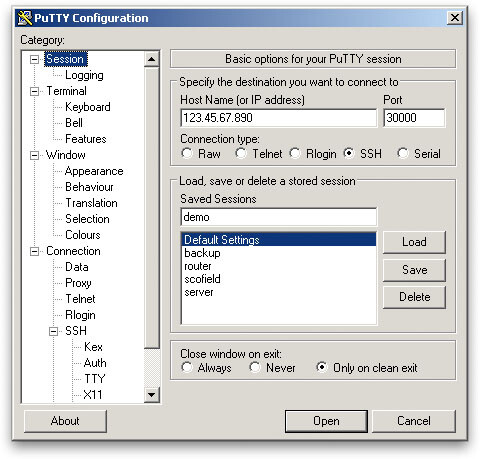
Once you have saved your session, your key will be loaded automatically upon connecting to your VPN.
Summary
Opting for a key-based authentication to your SSH server is beneficial in many ways. By eliminating the possibility of SSH brute-force attacks targeted towards your VPN, the chances of it being compromised are decreased by an order of magnitude.
Author: Josh@SliceHost && Netsblog


